
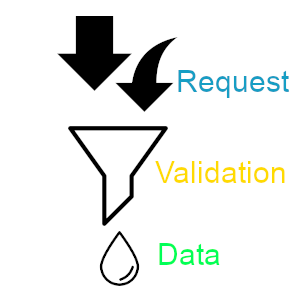
In Slim4 API Request Validation Tutorial, we will discuss how to do incoming request validation. This is process quite important to do, in order to improve the system / application security. Validation is a processing to check the request from the user. Validation requests can be used for avoiding errors, bad data, or even database SQL injection . Some feature can be done in the validation process, such as making sure the email address is correct, input only numbers format, alphanumerics, and so on.
PHP Slim4 API Tutorial: 2 Request validation using cakephp/validation
The method that can be used to validate the request is to write a validation manually and use an existing package. In this tutorial, we will use existing validation package to validate the user requests. One of the validation packages that can be used on Slim4 is cakephp/validation. Installation and implementation cakephp/validation is quite simple. Installation can be done using composer command:
composer require cakephp/validationValidation implementation can be applied in Slim4 routes. When there is an user's request coming, system will check the incoming request. Before the request data is processed by the system, the validation process will be executed first. Then the system will proceed to the logical process or bussiness process. When the request validation fails, it will return a warning to the client. We can use cakephp/validation features for validation the request. Class that handle this action is Validator class. We can use Validator class as follows:
$validator = new Validator();
$validator->requirePresence('email', true, 'Email is required')
        ->notEmptyString('email', 'Email field is required')
        ->email('email', false, 'Email must be valid')
        ->requirePresence('password', true, 'Password field is required')
        ->notEmptyString('password', 'Password is required')
        ->requirePresence('name', true, 'Name field is required')
        ->notEmptyString('name', 'Name is required');
Save the data using User Model
When request validation has valid result, then the data will be stored in the database. The process to store the request data into database can be done by User modelHow to create User model can be checked in Slim4 Eloquent database without installing the Laravel tutorial. This the example code for checking the request validation and saving user data on User model:
// other code
use Cake\Validation\Validator;
use App\Models\User;
// other code
$app->post('/register', function (Request $request, Response $response, $args) {
    $body = $request->getBody();
    $json = json_decode($body, true);

    $validator = new Validator();
    $user = new User();

    $validator->requirePresence('email', true, 'Email is required')
        ->notEmptyString('email', 'Email field is required')
        ->email('email', false, 'Email must be valid')
        ->requirePresence('password', true, 'Password field is required')
        ->notEmptyString('password', 'Password is required')
        ->requirePresence('name', true, 'Name field is required')
        ->notEmptyString('name', 'Name is required');
    $errors = $validator->validate($json);
    if ($errors) {
        $messages['message'] = 'Register failed';
        foreach($errors as $error) {
            $messages['error'][] = array_values($error);
        }
        $statusCode = 400;
    } else {
        try {
            $messages['message'] = 'Register successfully';
            $statusCode = 201;
            $user->email = $json['email'];
            $user->password = sha1($json['password']);
            $user->name = $json['name'];
            $user->level = 0; // ex: default level for user
            $user->status = 1; // ex: default status for active user
            $user->save();
        } catch (\Exception $e) {
            $messages = [
                'message' => 'Register failed',
                'error' => $e->getMessage(),
            ];
            $statusCode = 400;
        }
    }

    $message = json_encode($messages);
    $response->getBody()->write($message);
    return $response->withHeader('Content-Type', 'application/json')
        ->withStatus($statusCode);
});
// other code
$app->run();
We can use sample json user data below to test request validation using Postman application:
{
    "email": "user@perangkatlunakku.com",
    "password": "12345",
    "name": "User"
}
Register user using Postman

Full code can be viewed at Github.
Pingback: Slim4 Fashion Store API: 3 Login user dan JWT access token – PerangkatLunakKu
Pingback: Slim4 Tutorial API: 3 JWT access token - PerangkatLunakKu
Pingback: Tutorial PHP Backend Slim4 - PerangkatLunakKu